How to Protect User Data When Updating Apps with Flutter
-
November 20, 2024

Crafting a mobile application that users find intuitive and seamless is not merely about sleek design—it's about guiding users through every tap, swipe, and input with utmost ease.
Imagine filling out a form on a mobile app, investing your time and effort into it. But then, switching to another app, only to find out that all your data is gone. It's a feeling of helplessness and frustration that inevitably sours your mood and leaves a negative impression of the app experience.
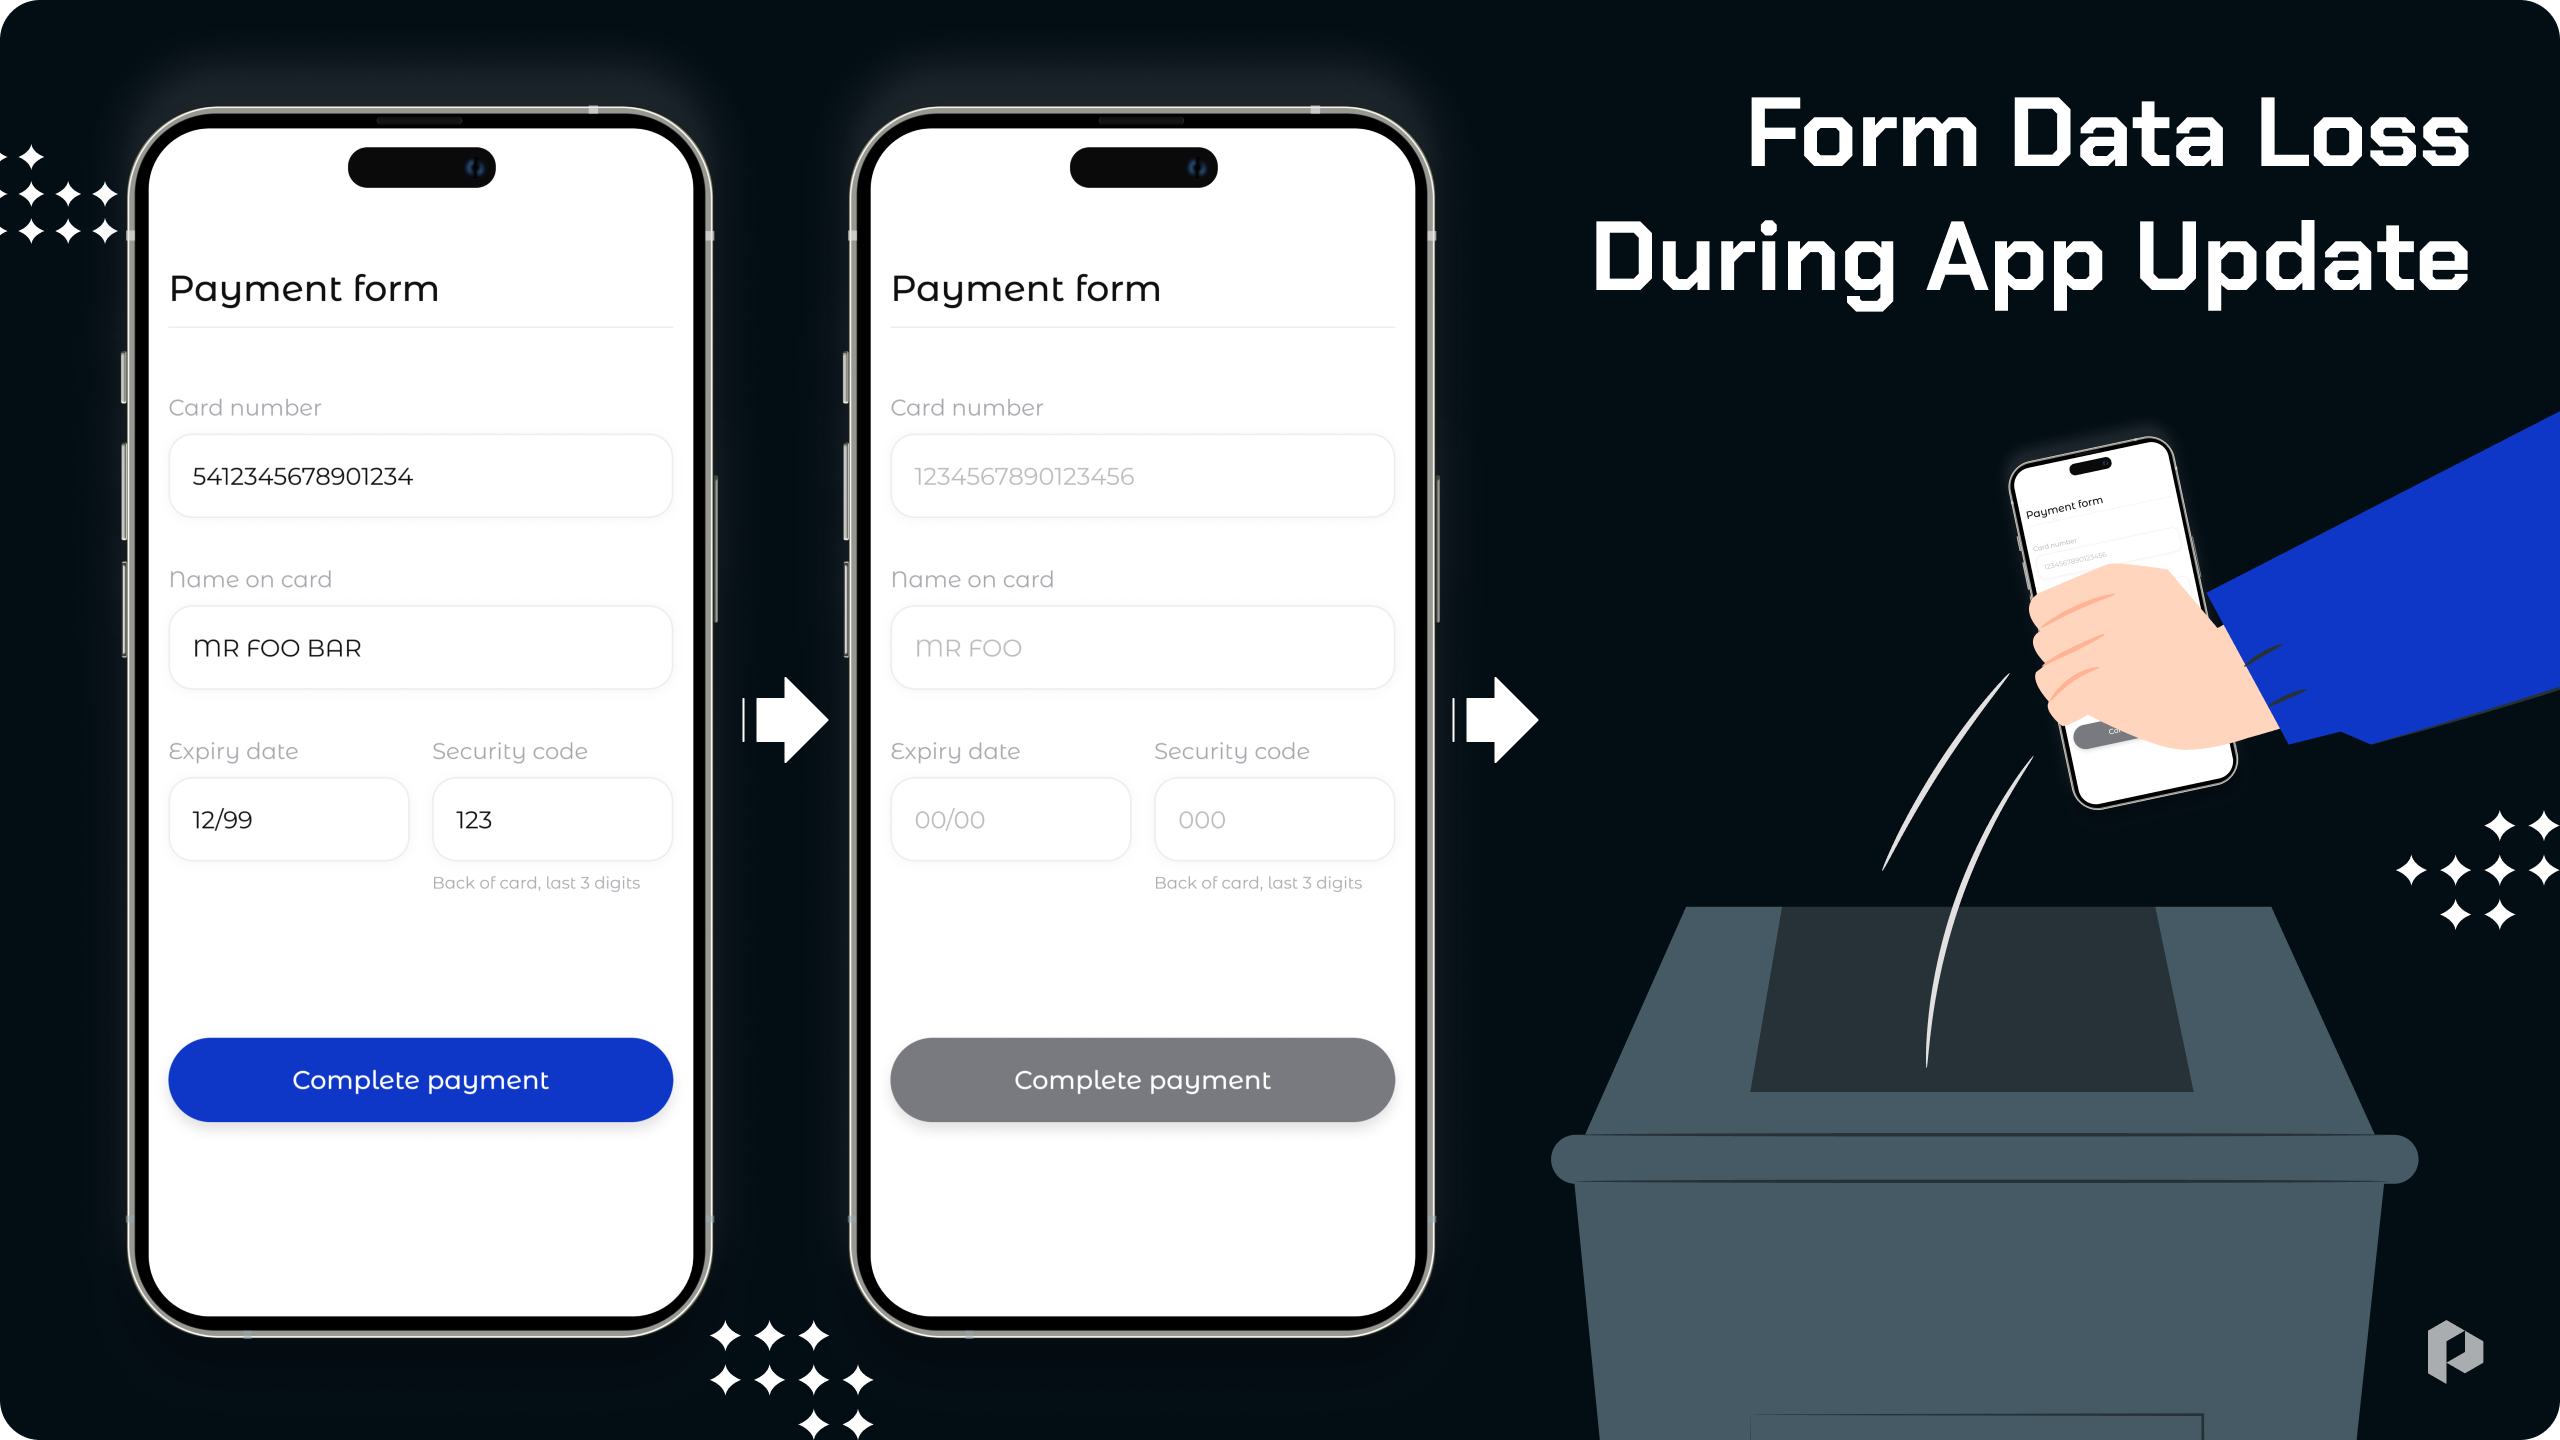
It's a common occurrence, not a developer's oversight, rooted in the device's energy-saving settings. Data reset is good for the phone, inconvenient for the user, and a real disaster for businesses.
Studies show that 71% of users abandon a mobile app after encountering two or three glitches or errors. Due to poor customer service, companies lose about $1.7 trillion globally each year.
Unfortunately, not all developers care about this. The construction of application tools is dictated by:
First, the stated requirements in the technical specification - don't forget to specify in the feature description the requirement for user data restoration.
Second, the conditions of the chosen platform.
In this article, we'll delve into one of the most promising solutions in the realm of mobile app development: Flutter and its robust toolkit for preserving user data. Let's explore how Flutter addresses the need for seamless user experiences while offering practical insights for developers keen on enhancing their apps' reliability and user satisfaction.
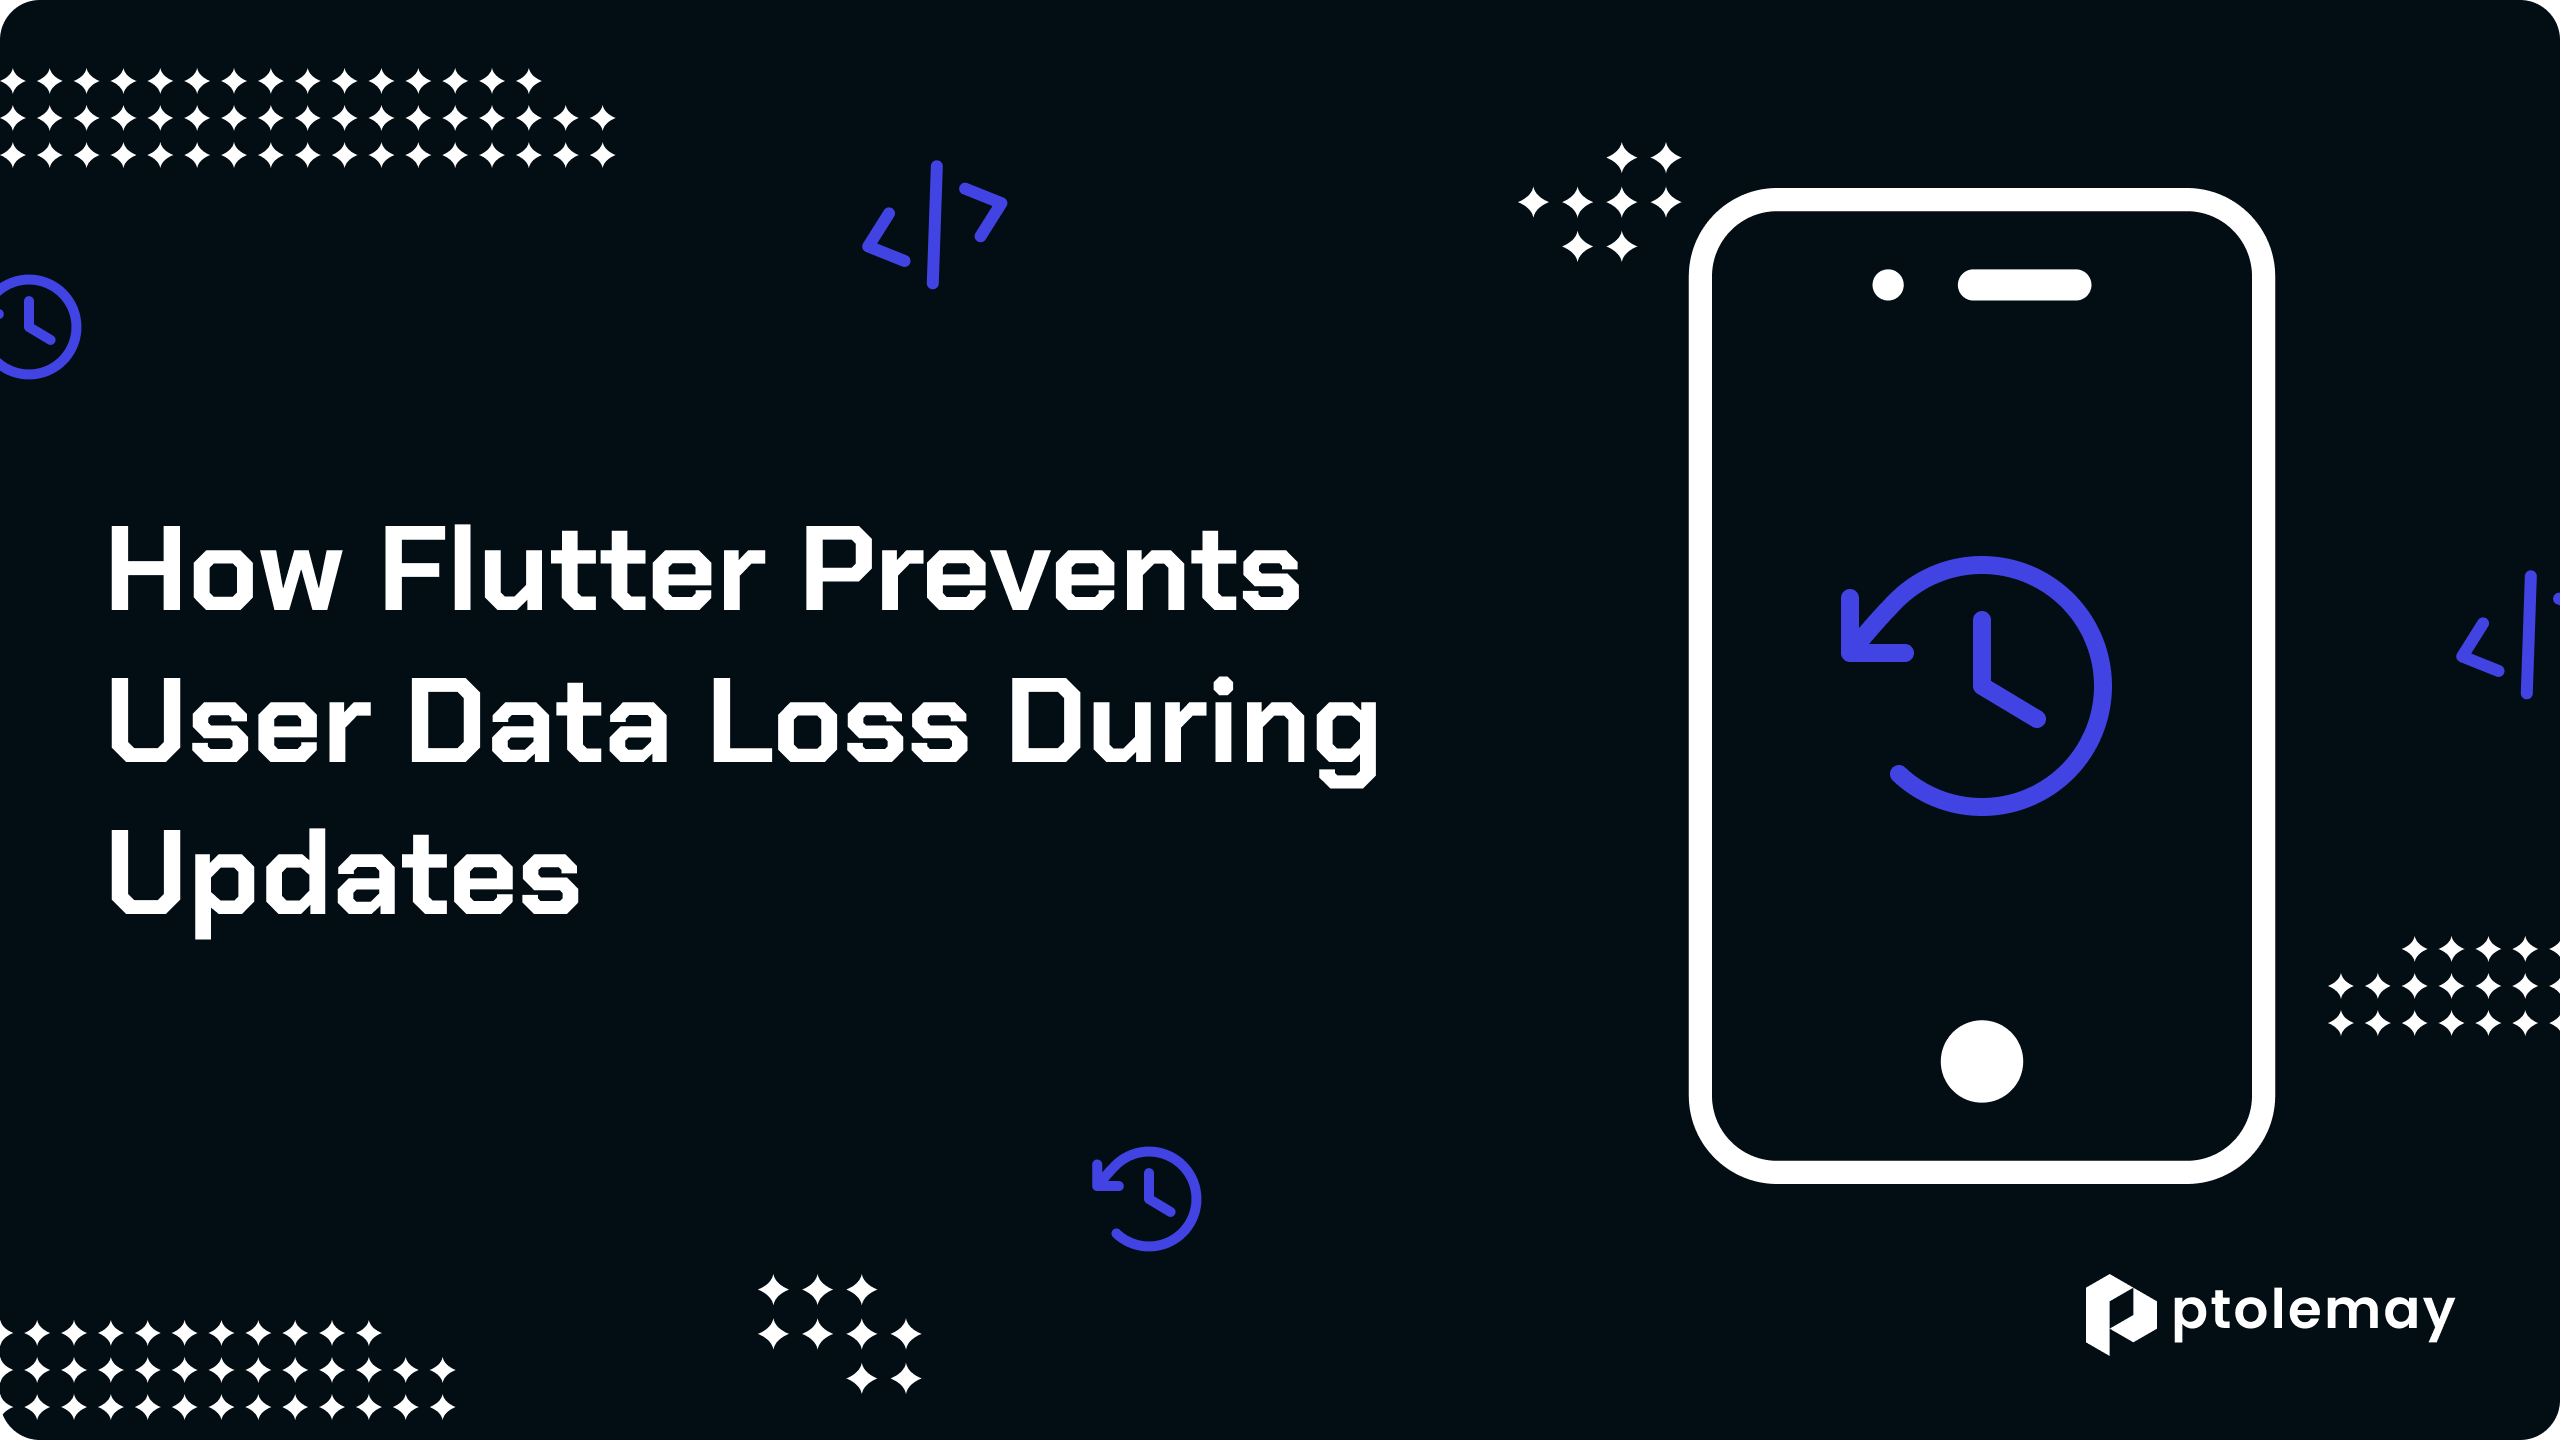
How Flutter Prevents User Data Loss During Updates
Flutter, Google's versatile UI toolkit, empowers developers to craft cross-platform mobile apps with precision and finesse. It's like having a Swiss army knife for app development, offering a wide array of tools to streamline the process and elevate the user experience.
Now, let's delve into one of Flutter's most powerful tools: RestorationManager. Picture it as a vigilant guardian for your app's data, diligently ensuring its preservation and integrity at all times.
RestorationManager functions as a meticulous archivist, meticulously cataloging and safeguarding the state of your app. Whether it's remembering form inputs, scroll positions, or intricate UI configurations, RestorationManager stands ready to restore them at a moment's notice.
Yet, its capabilities extend far beyond mere data retention. RestorationManager serves as a dynamic repository for a myriad of app states, from user preferences to transactional histories, providing a seamless and uninterrupted user experience.
Moreover, Flutter's flexibility allows developers to tailor RestorationManager to their app's specific requirements. Through custom configurations and optimizations, developers can harness the full potential of RestorationManager to meet their unique needs.
But Flutter doesn't stop there. It offers a comprehensive suite of state management solutions, empowering developers to choose the most suitable approach for their projects.
Flutter Simple State Restoration Tutorial
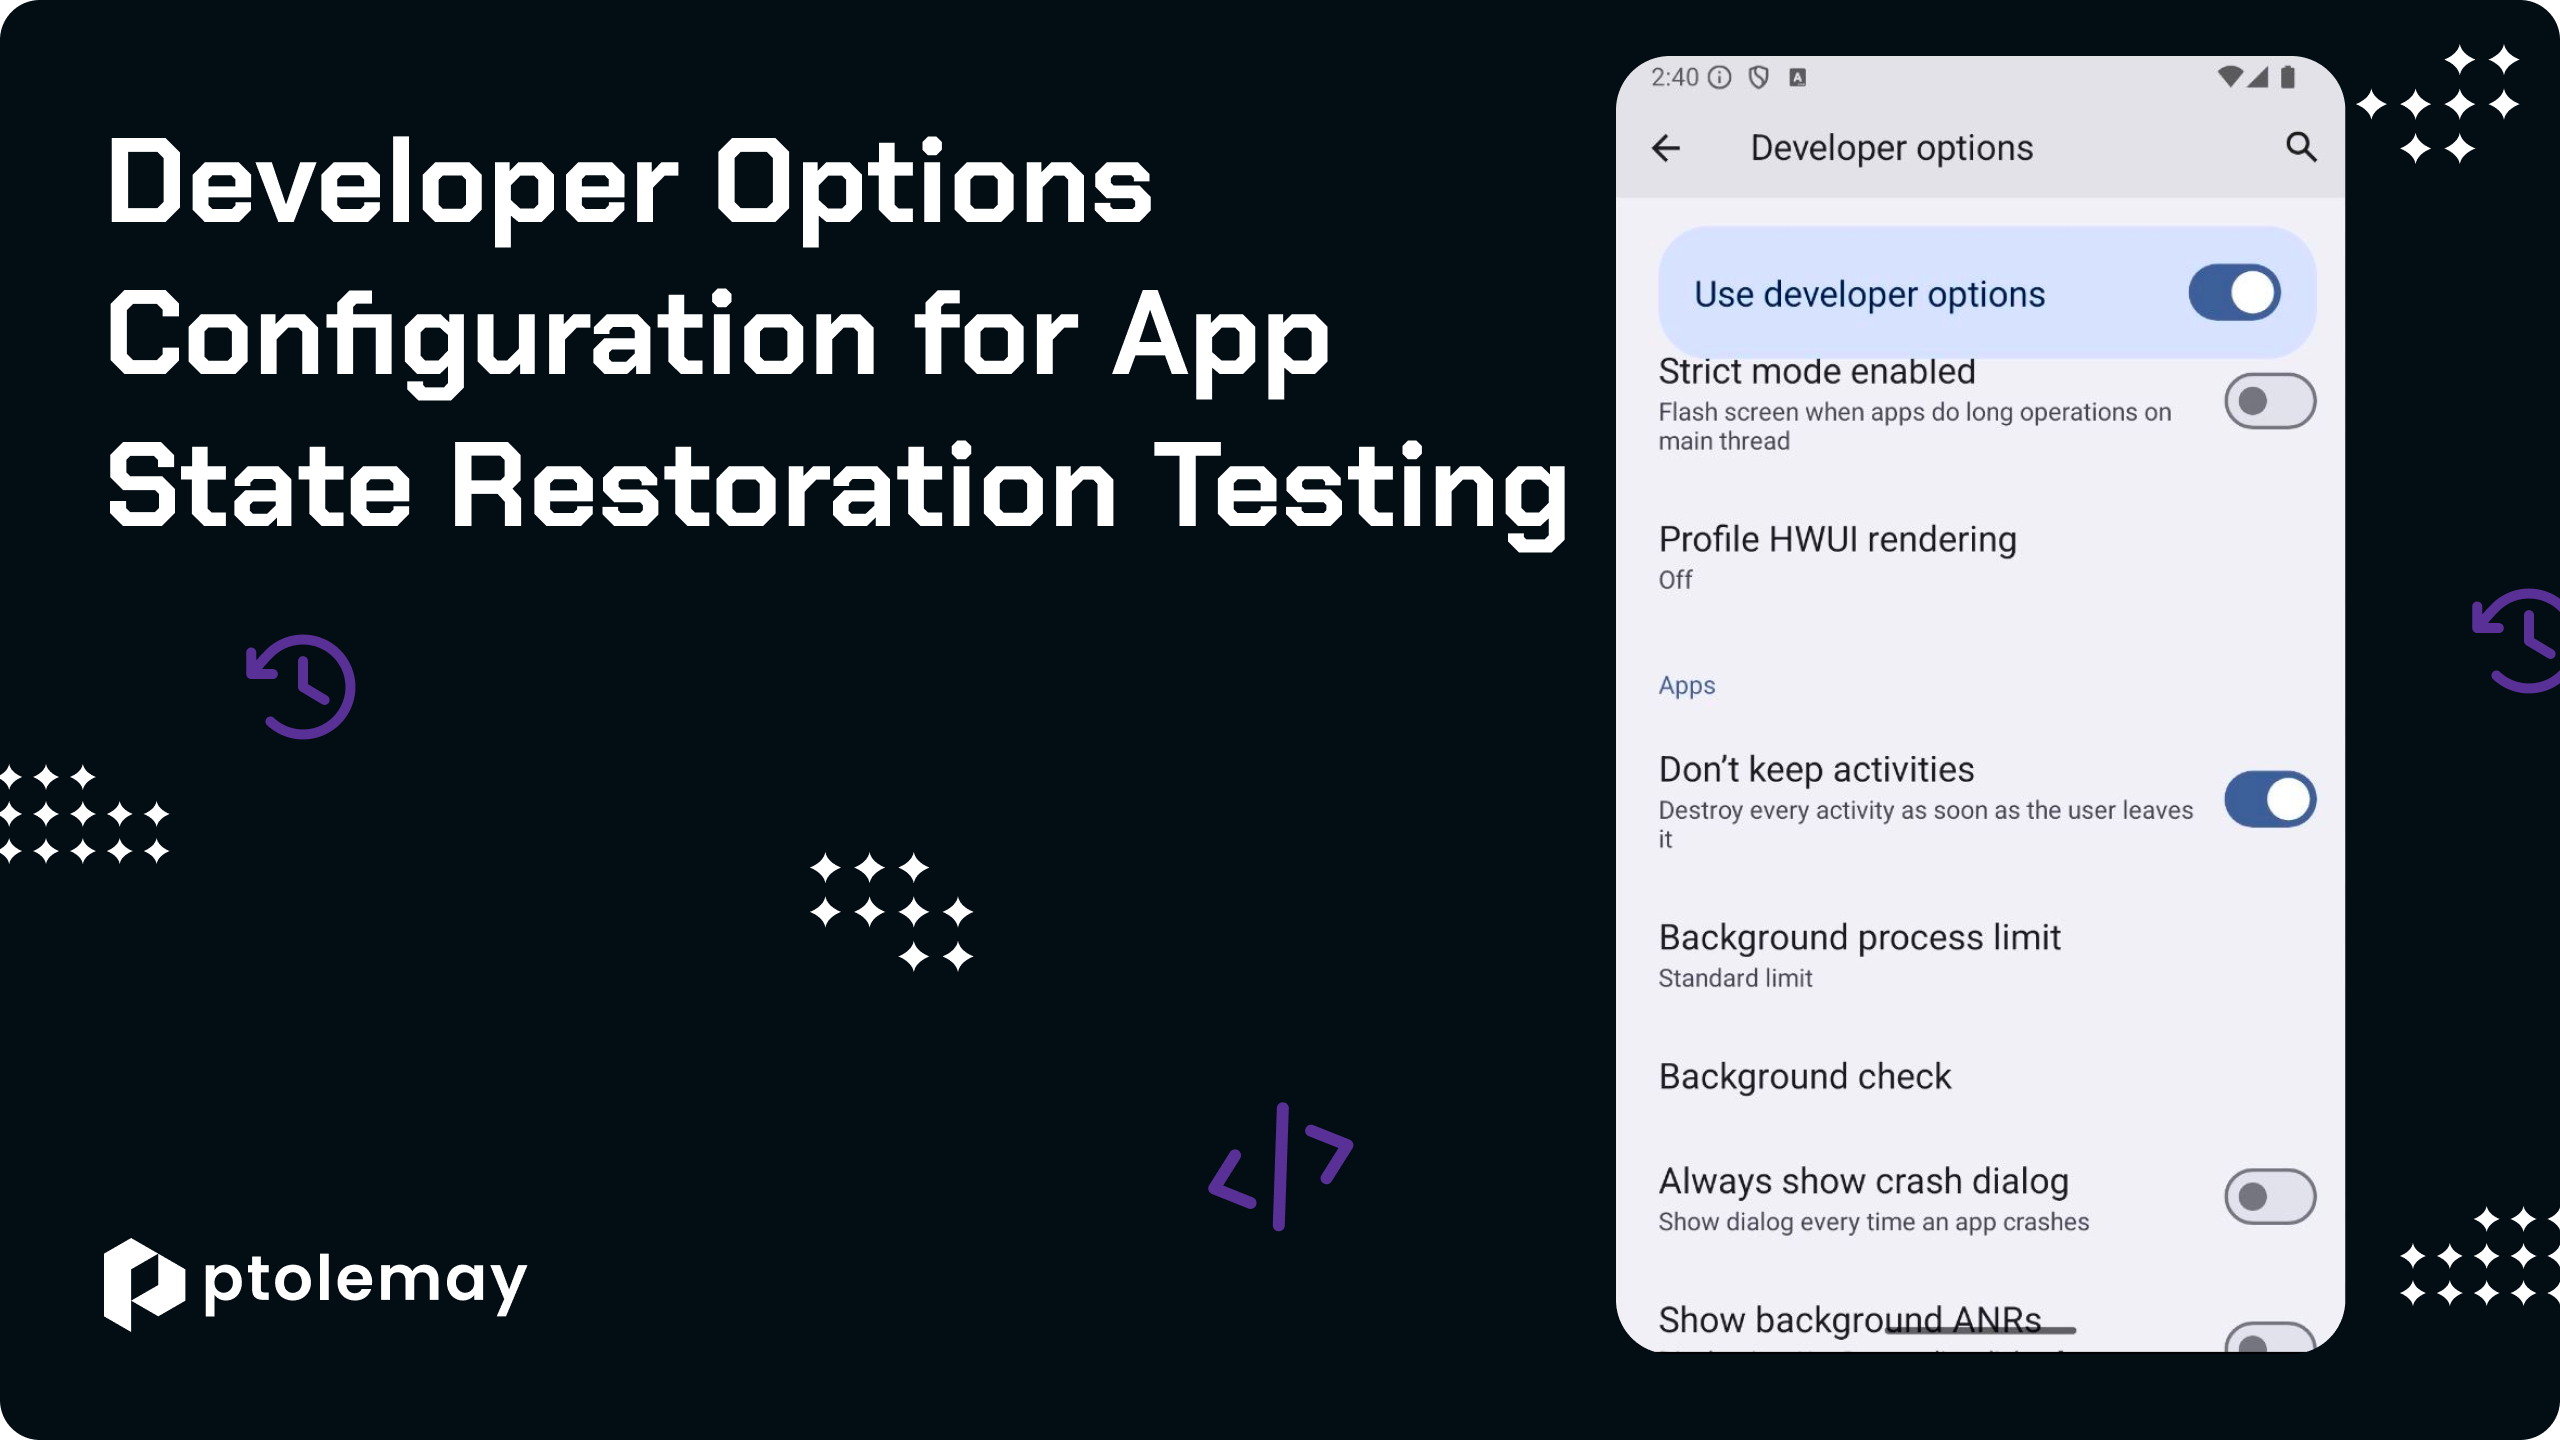
Okay, let's begin. However, before we proceed, it's necessary to disable app restoration from the developer options. This action simulates a scenario where the device lacks sufficient memory, leading to the termination of the app.
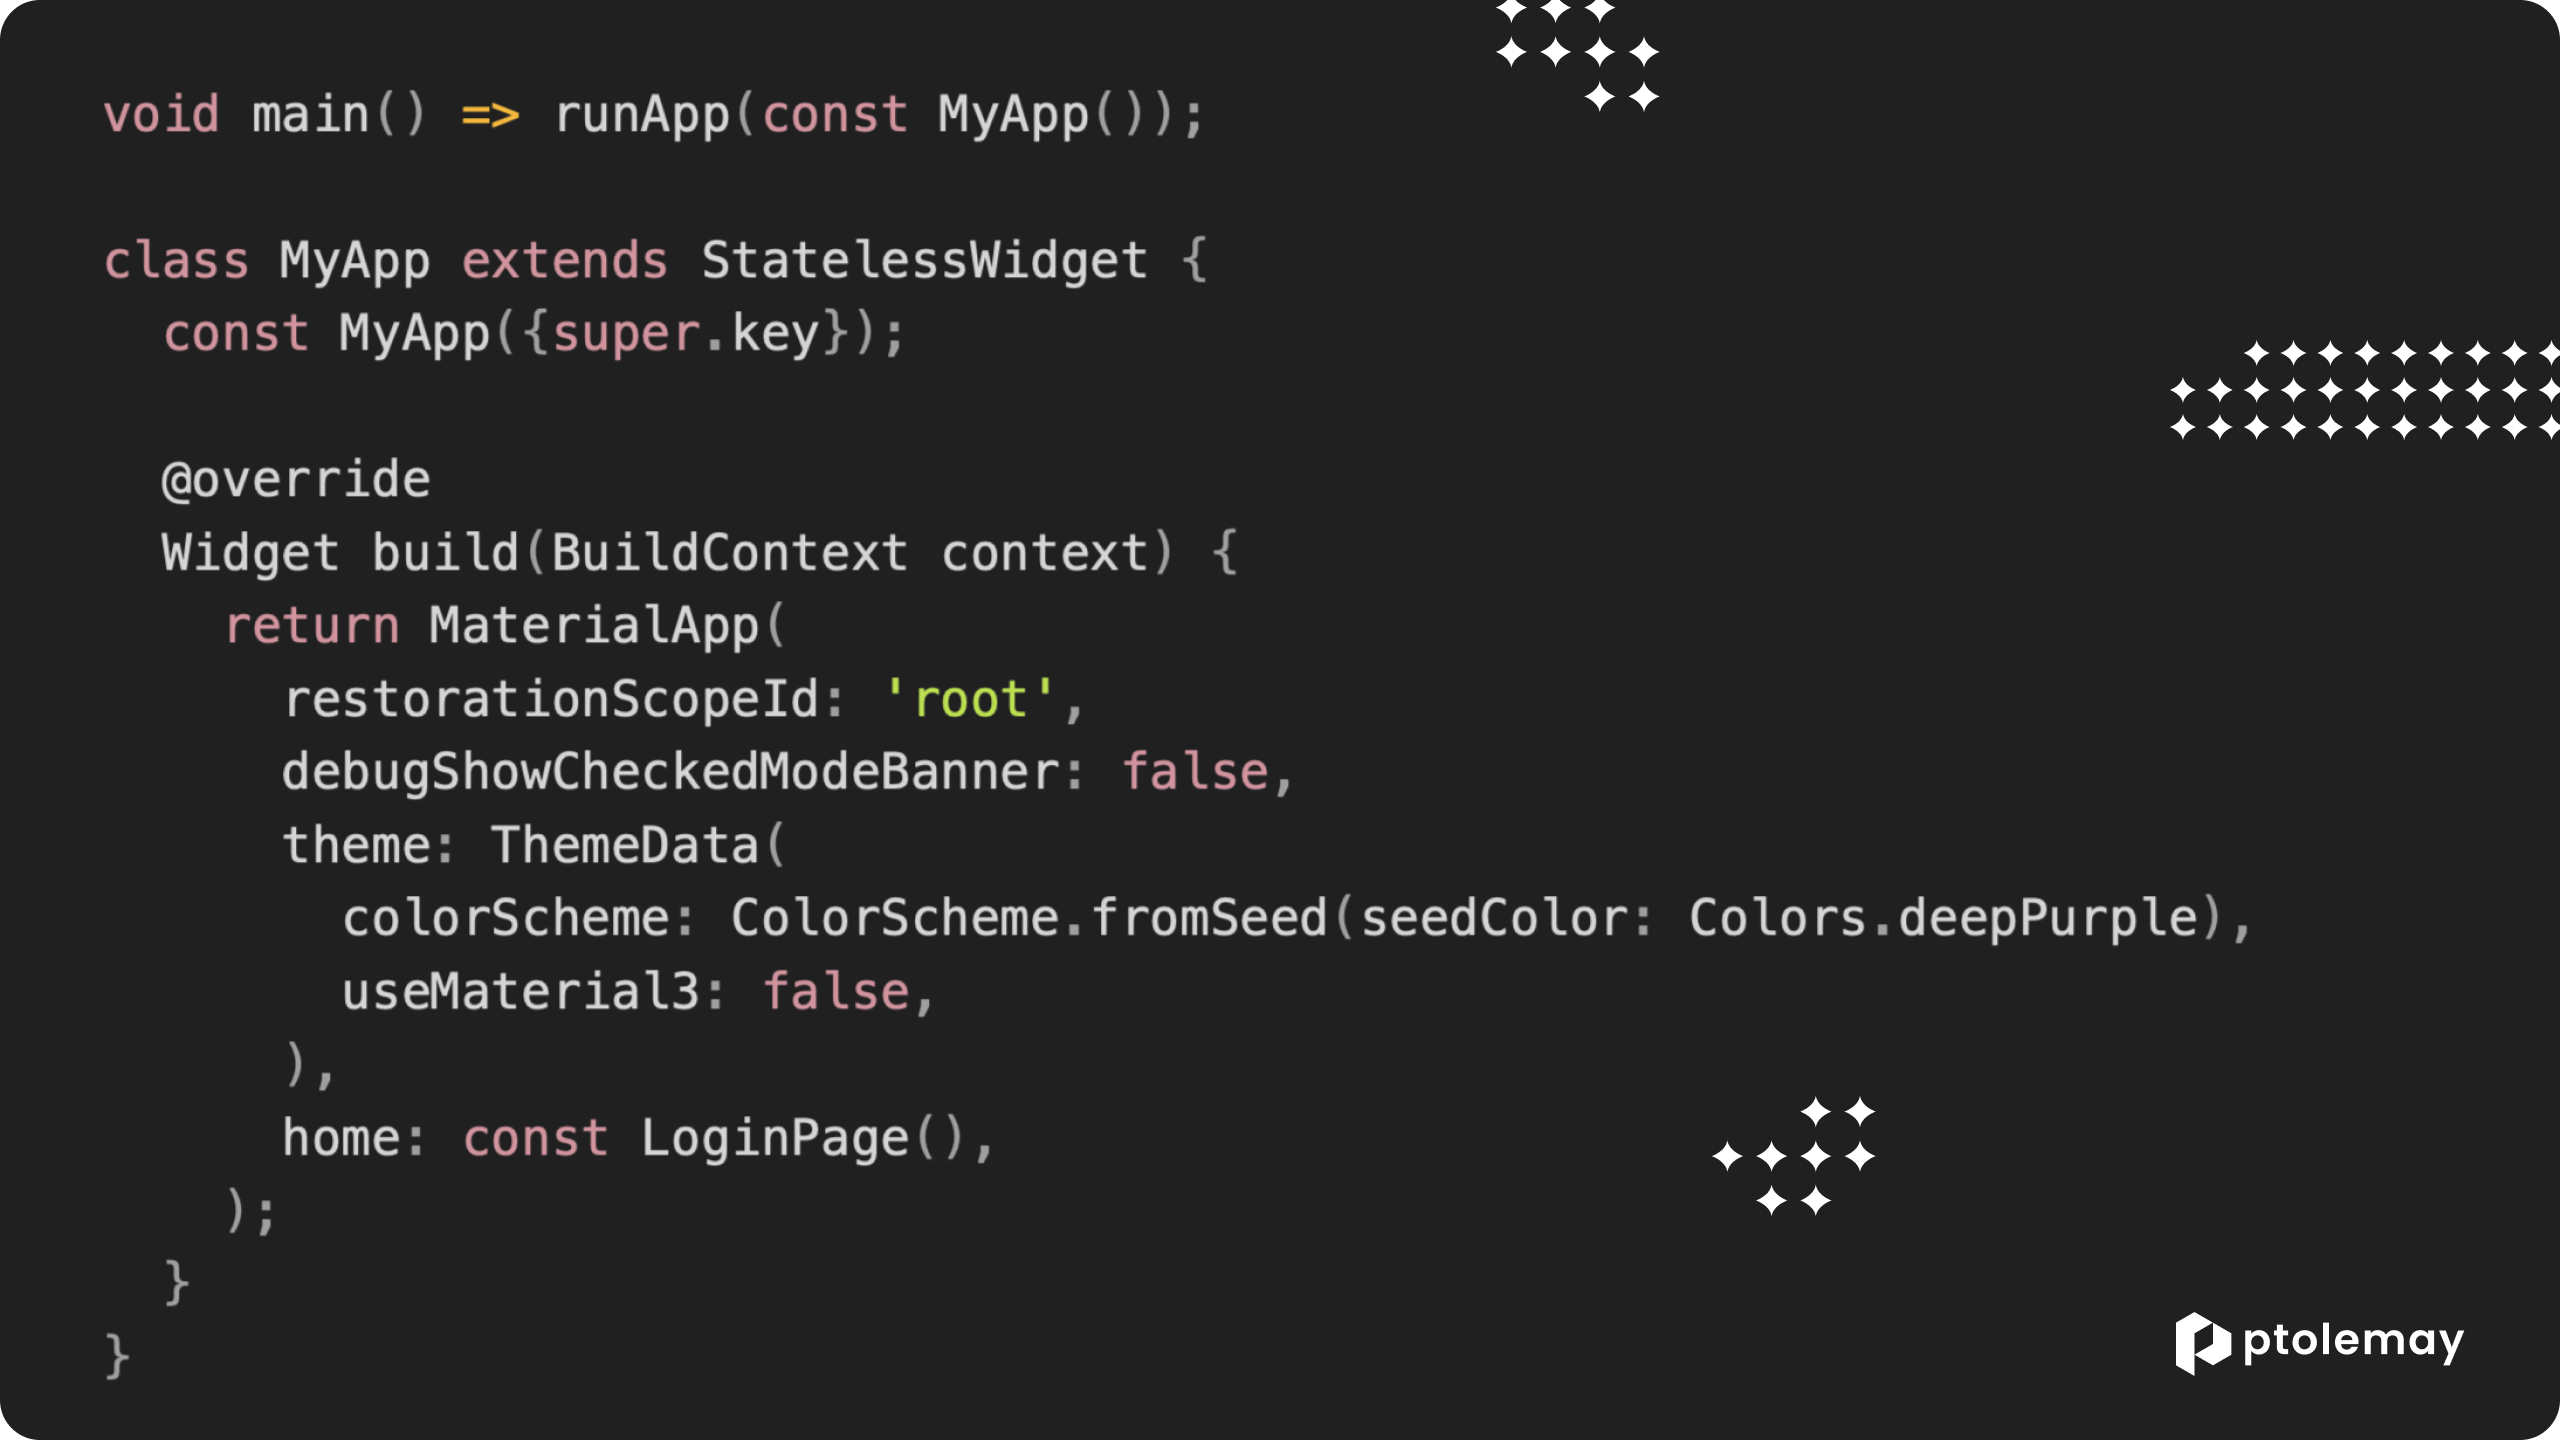
Before we dive into implementing state restoration, we need to set up the RestorationScope for our Flutter application. The RestorationScope serves as the container for managing the restoration state of widgets within the app.
Firstly, we define the restorationScopeId for our app, which is a unique identifier used by the operating system to identify and manage the restoration state. For simplicity, we'll set it to 'root', indicating that our restoration scope spans the entire application.
Now, let's proceed with implementing our pages. For testing purposes, we'll ensure they remain as simple as possible.
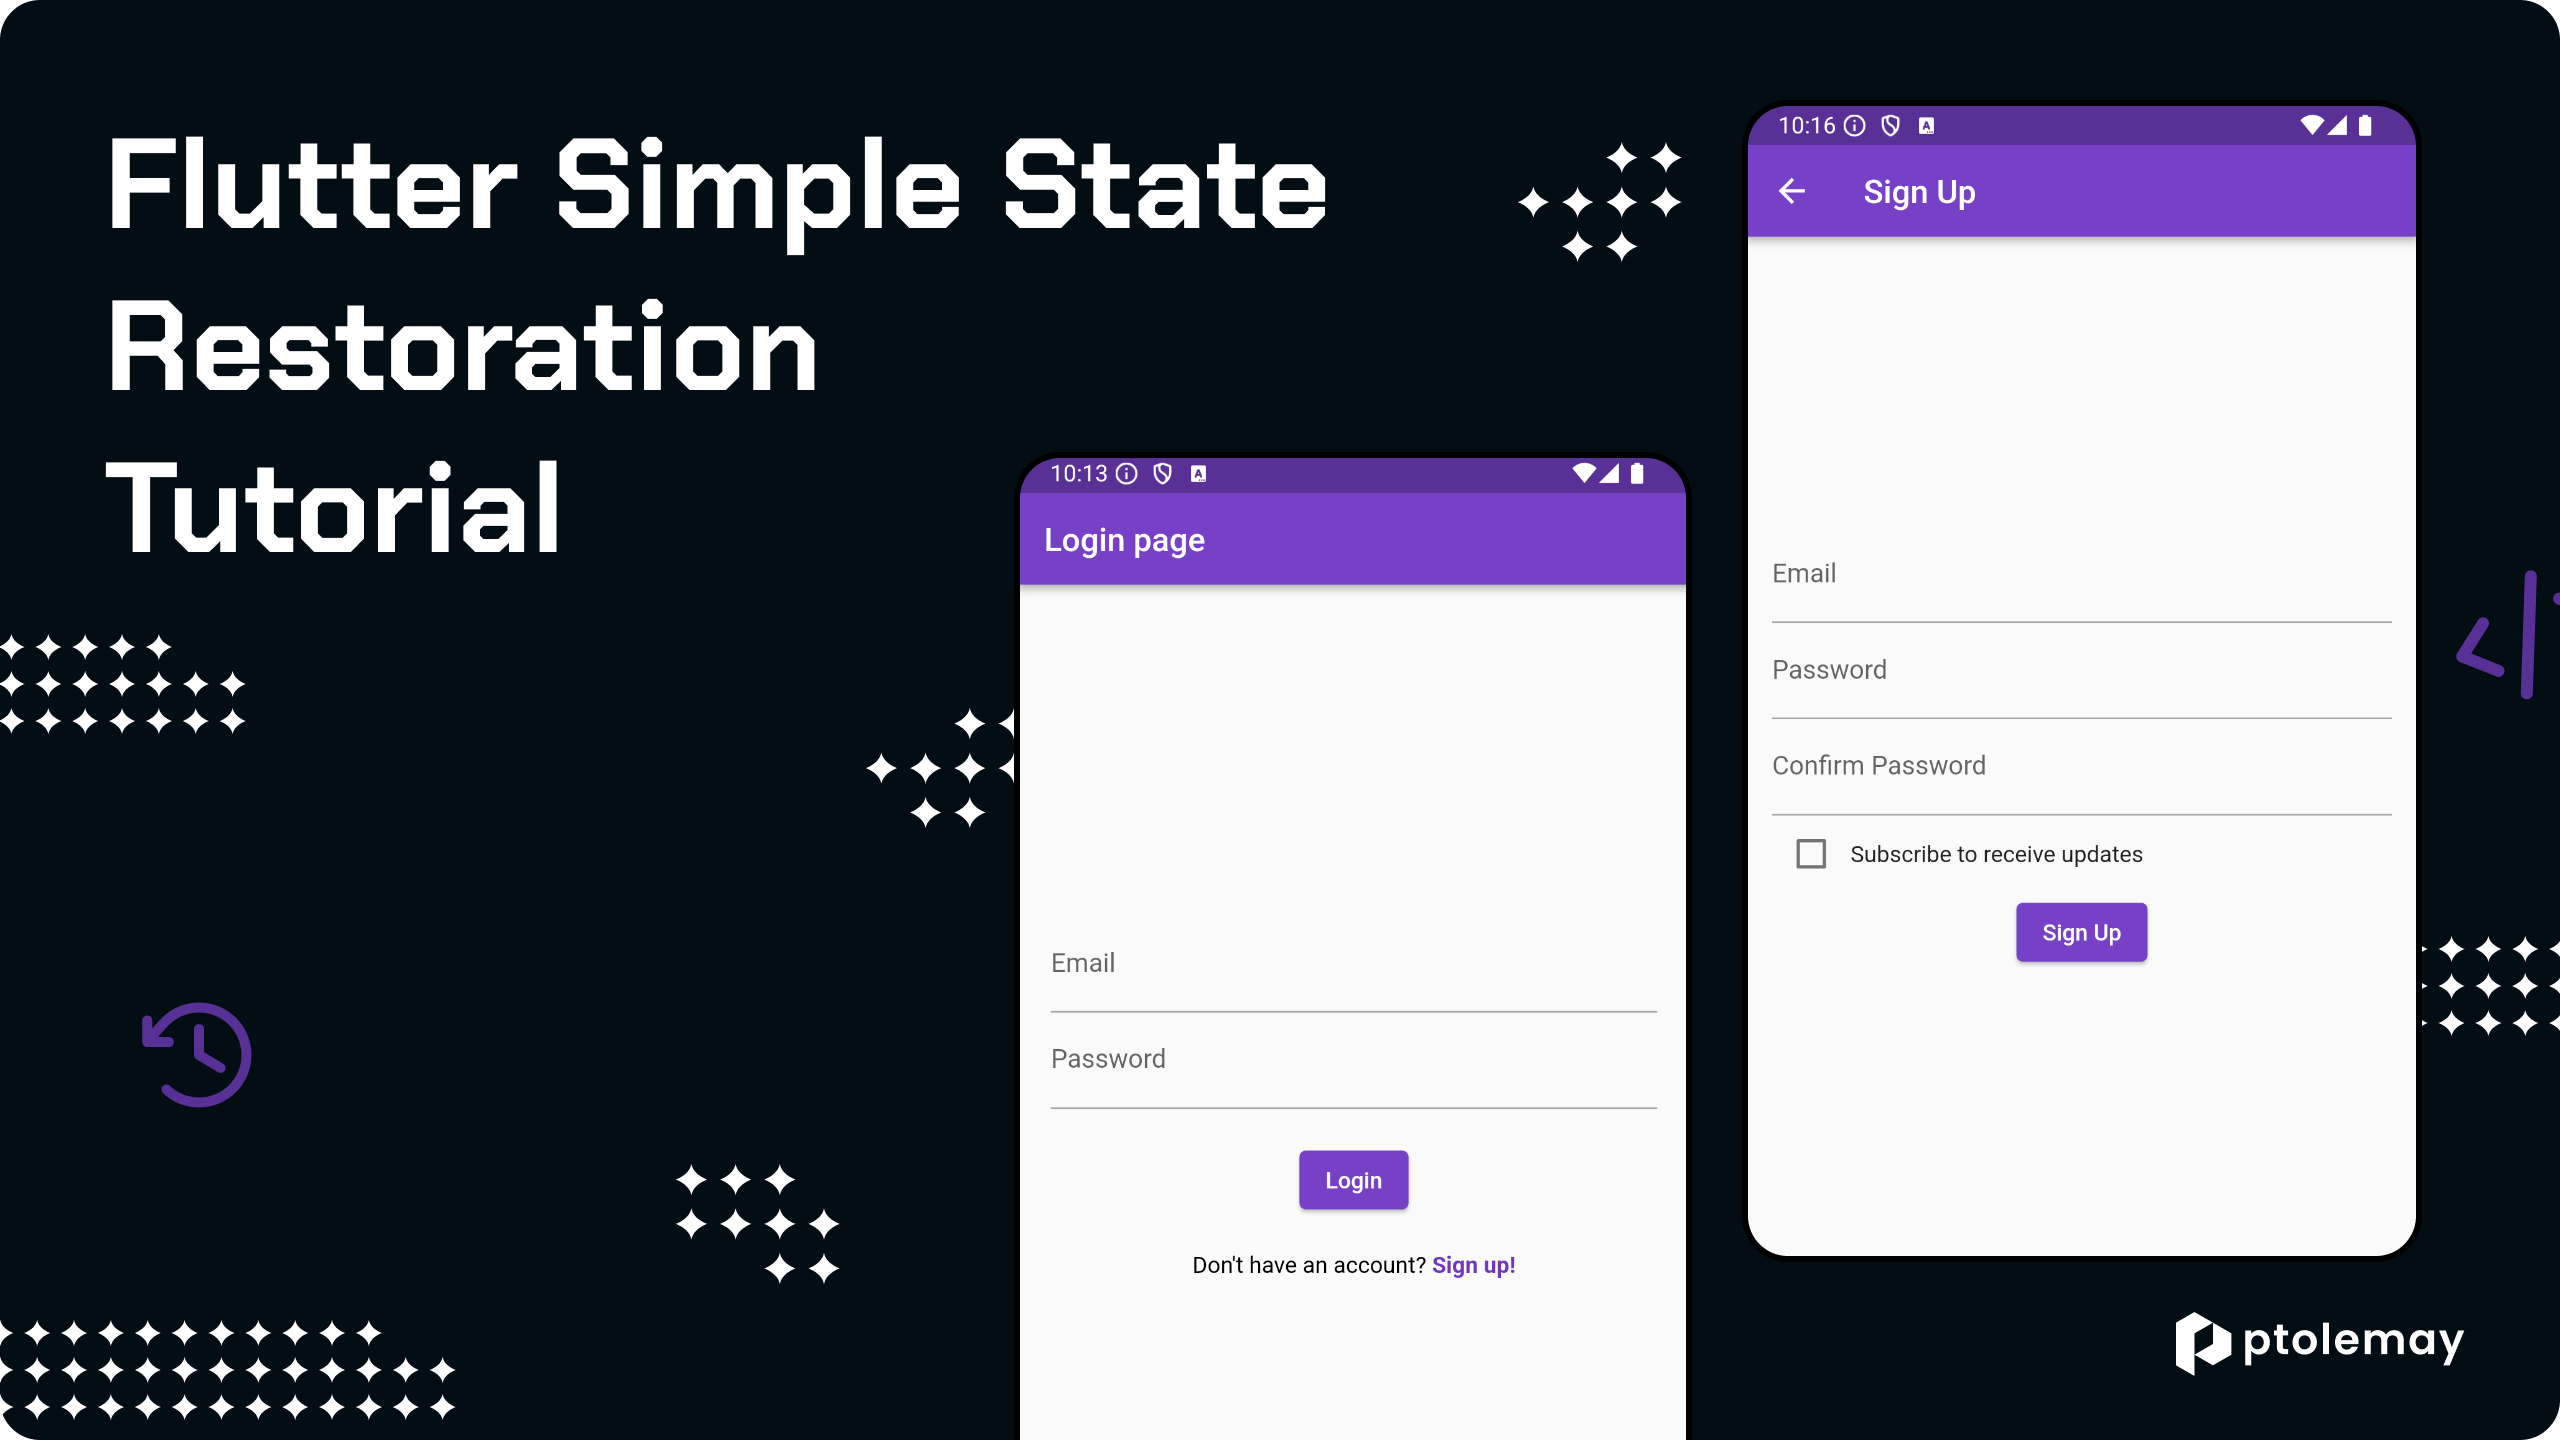
Here's what the Login page contains:
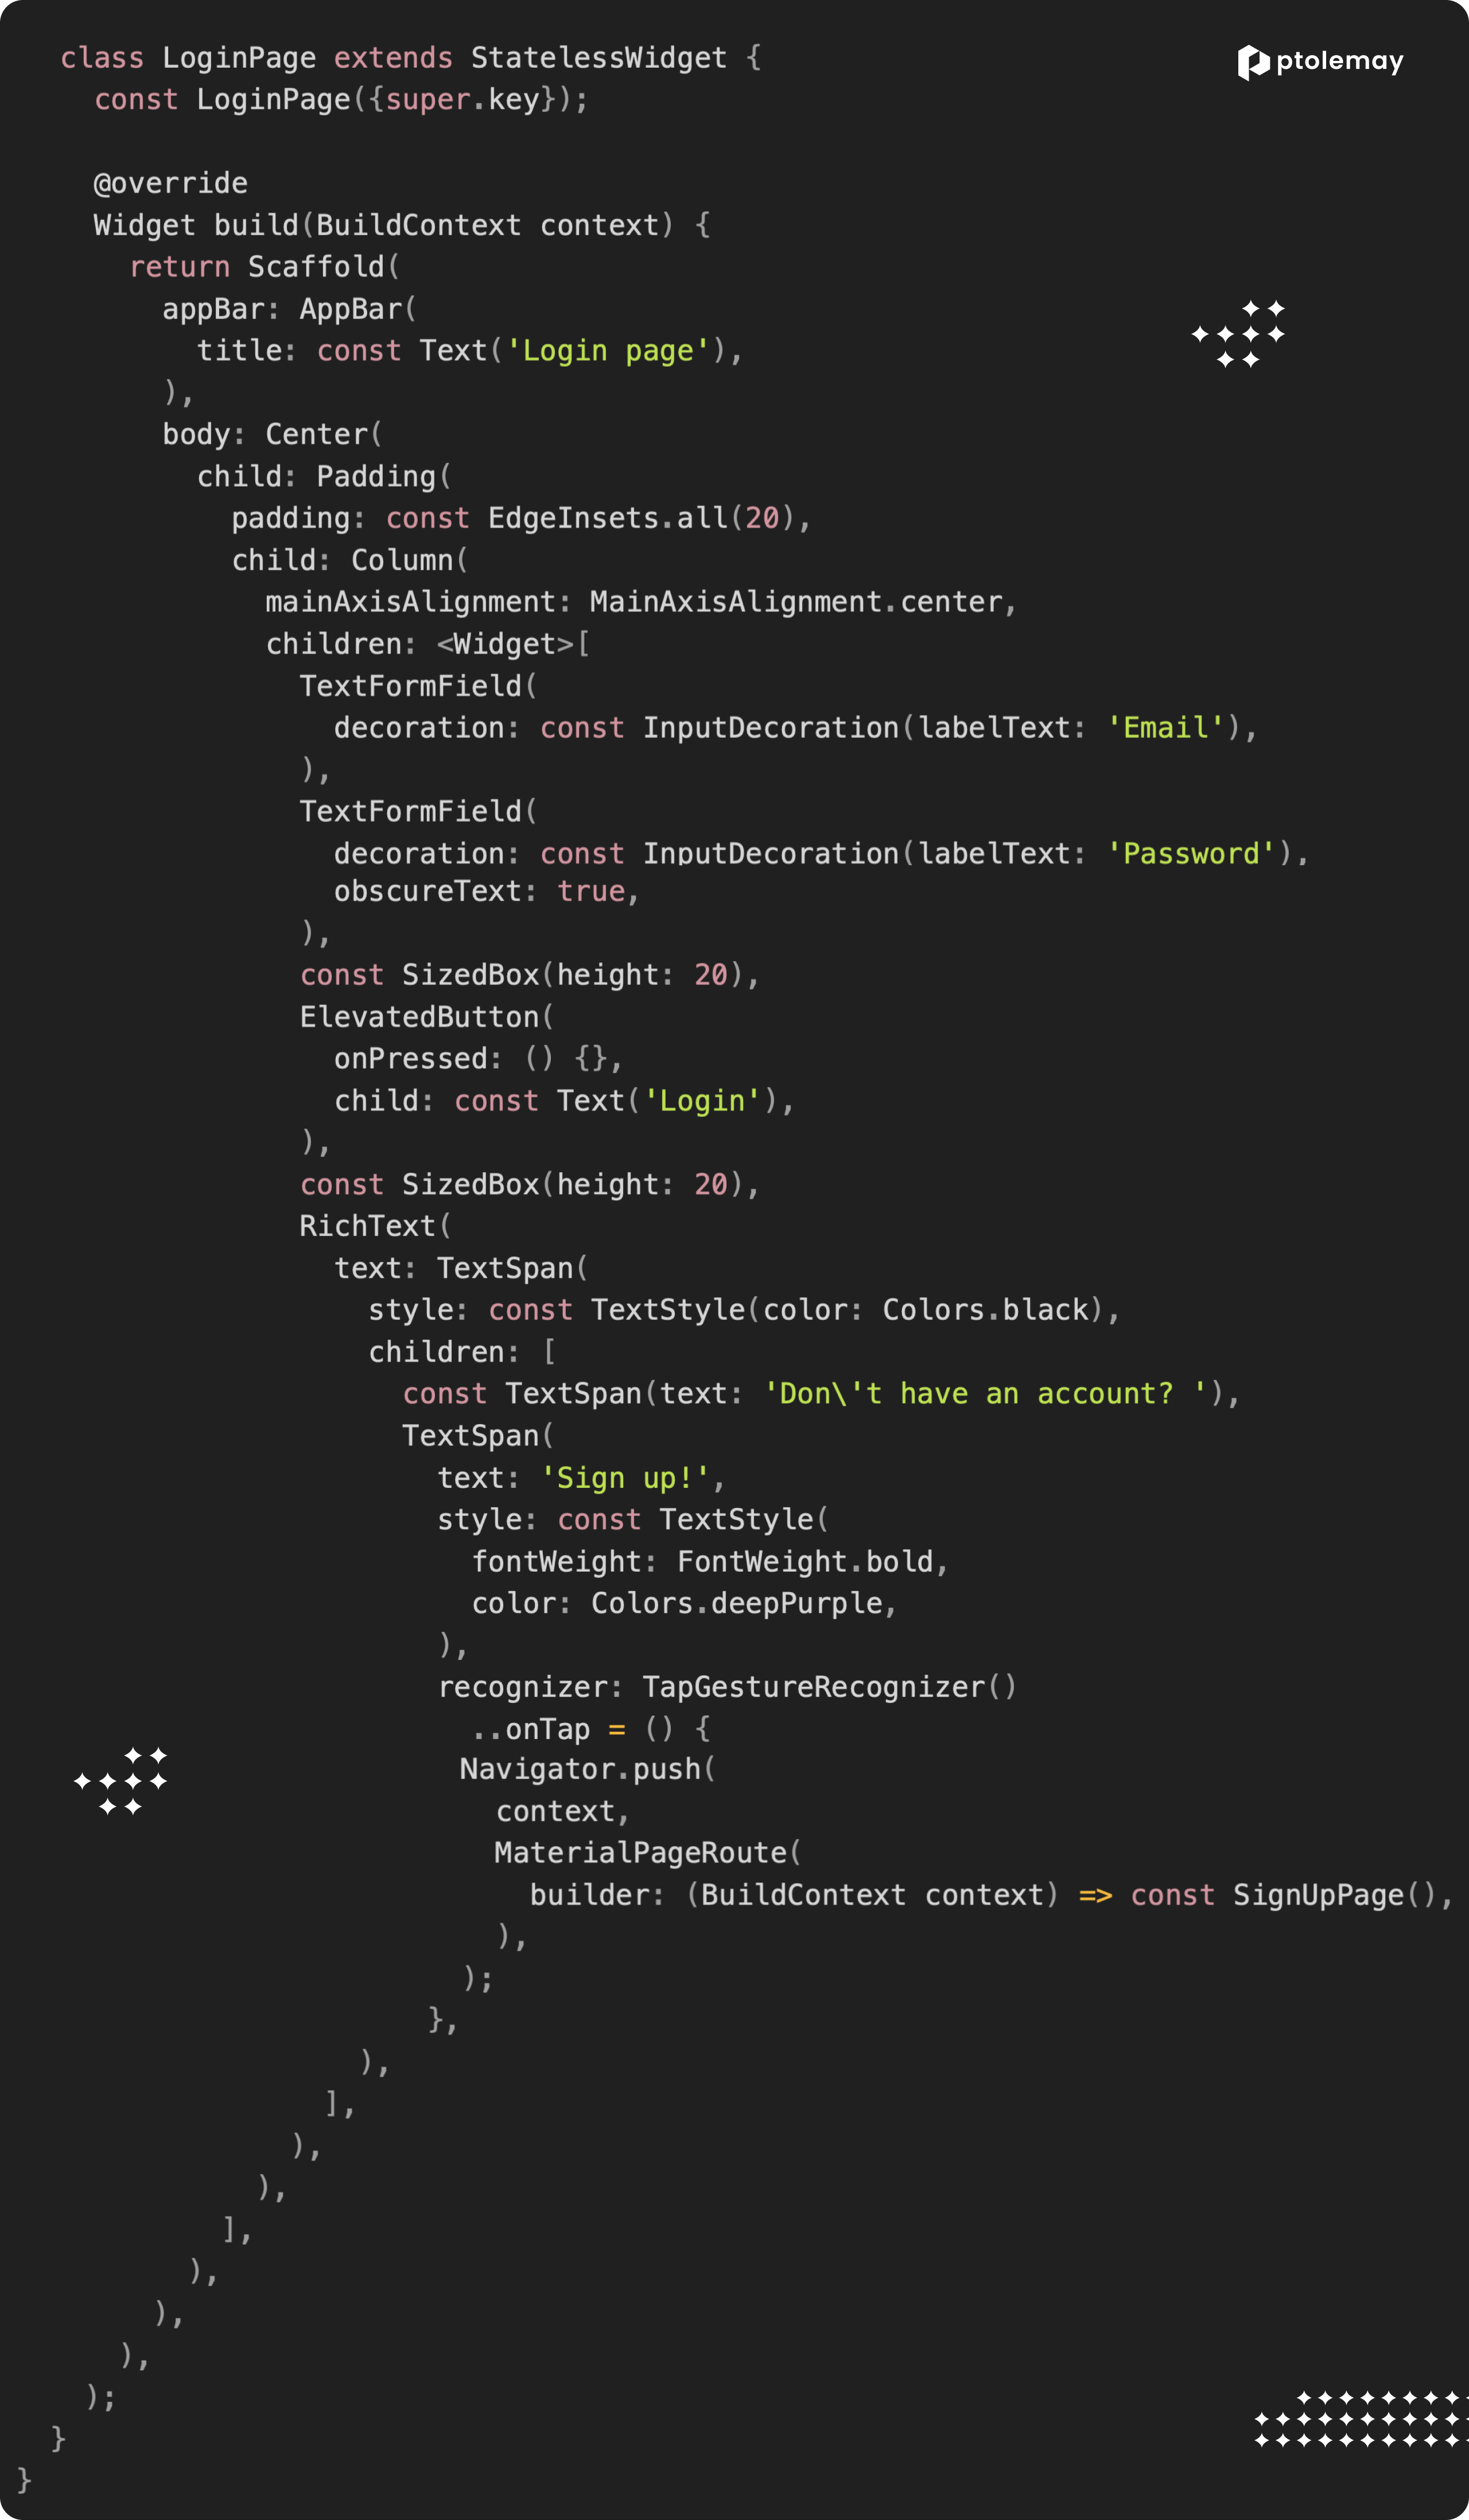
Here, there's nothing particularly noteworthy – just two input fields. When tapped, we'll navigate to the Sign-Up page, where the real action begins.
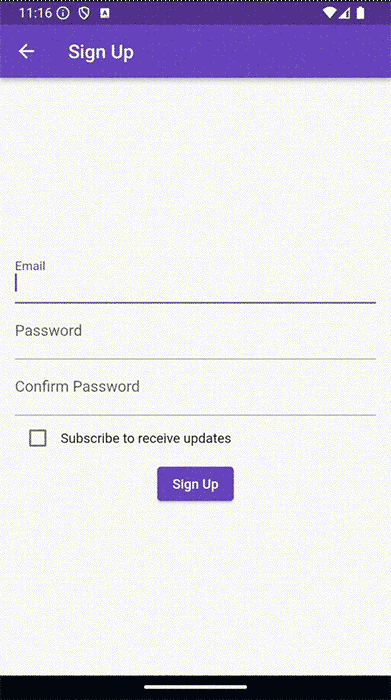
Here's what the Sign Up page contains:
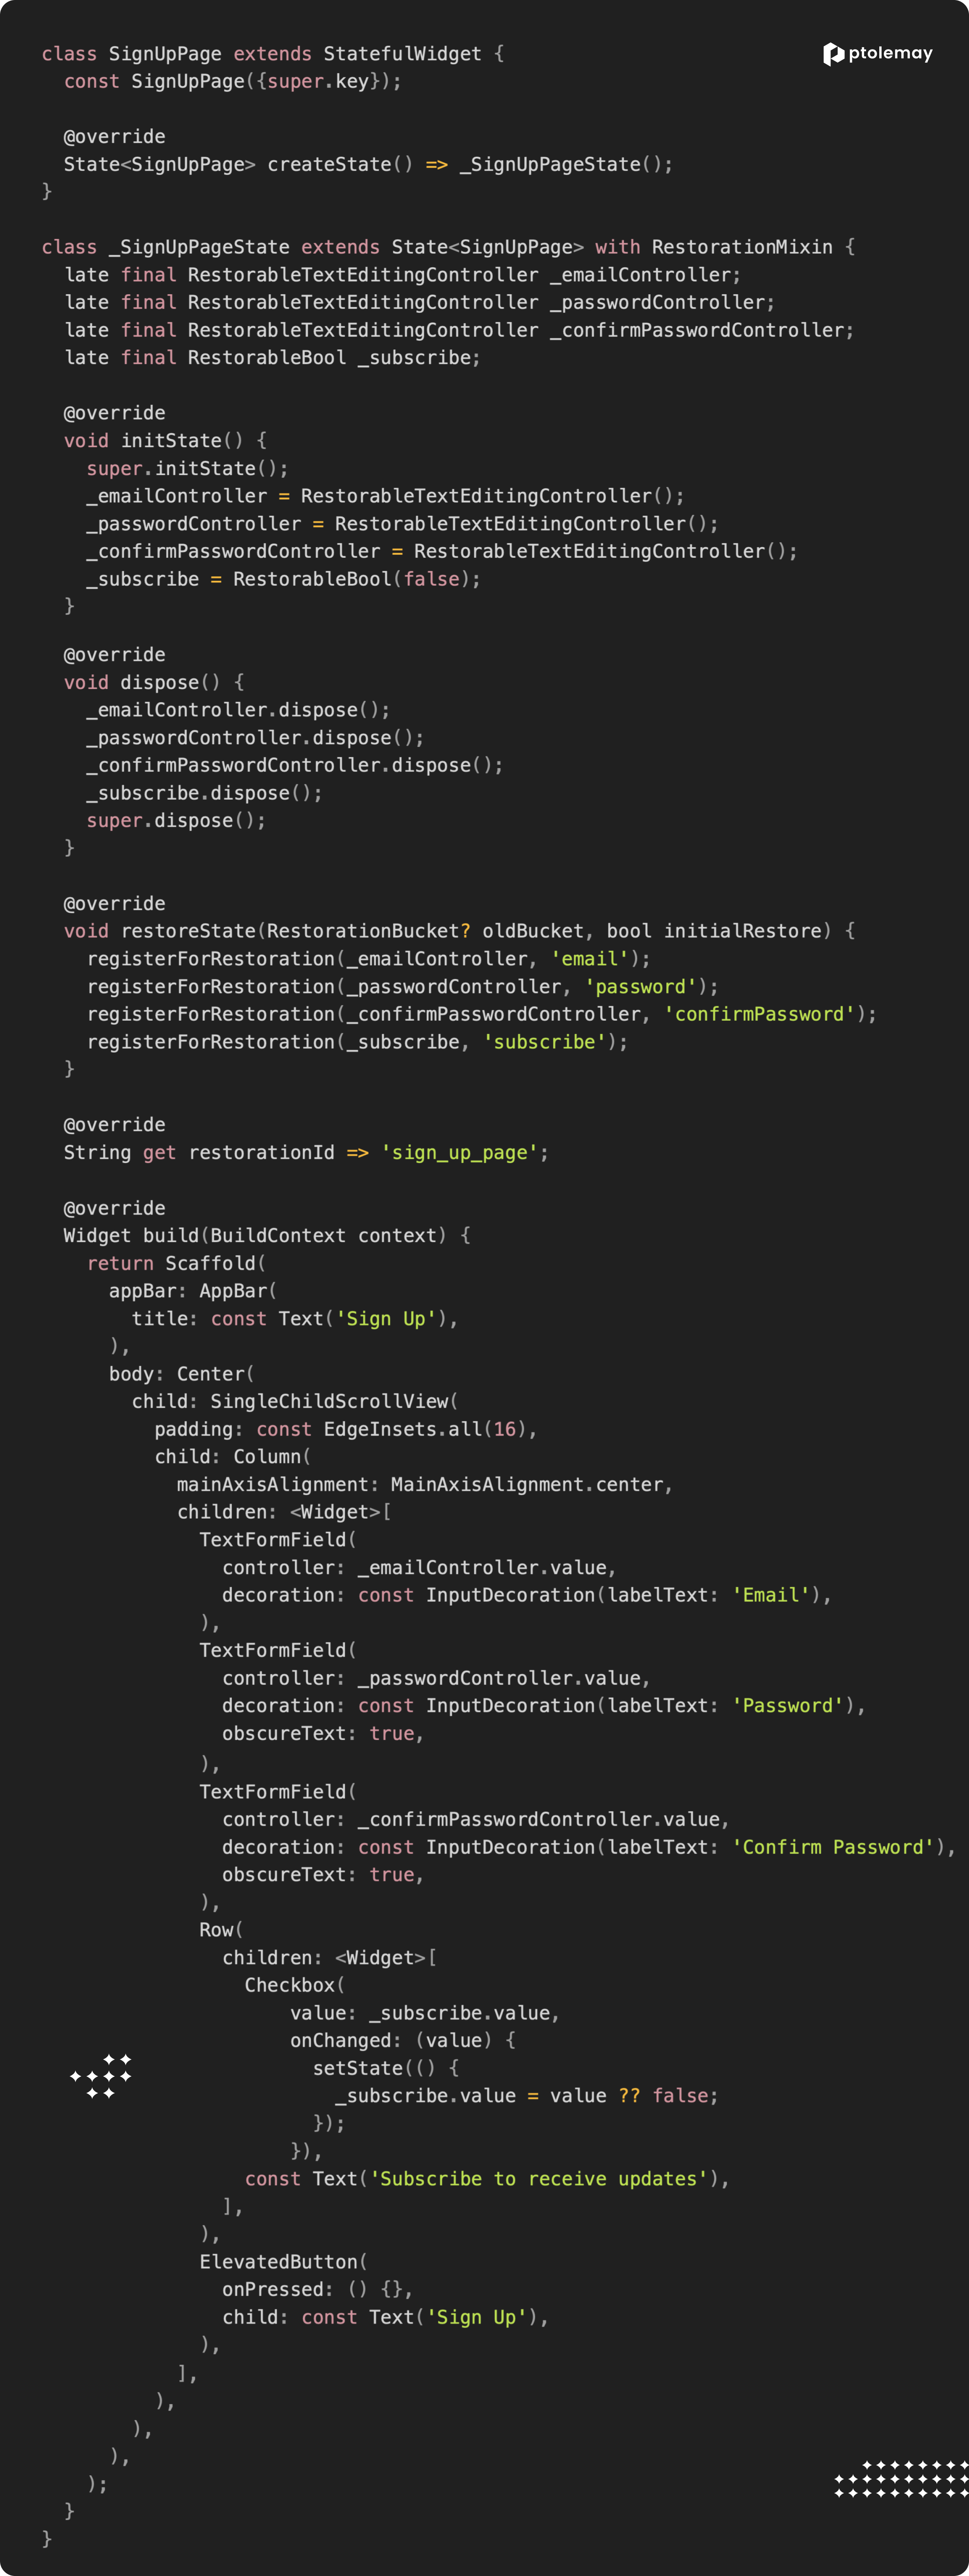
To utilize state restoration, we first need to ensure that our stateful widget class includes the RestorationMixin. This mixin provides the necessary methods and properties to manage the restoration of stateful widgets.
Once we've incorporated the RestorationMixin, we replace the conventional TextEditingController with the RestorableTextEditingController for managing text input fields. Similarly, for boolean values, we utilize the RestorableBool class to ensure that their state can be restored.
Now, for the restoration process to work seamlessly, we need to override the restorationId property within our stateful widget class. This property serves as a unique identifier for the restoration process. Each stateful widget that requires restoration should have a distinct restorationId to differentiate it from others.
Additionally, we need to implement the restoreState method. This method is called during the restoration process and is responsible for registering the stateful widget's variables for restoration. Within the restoreState method, we use the registerForRestoration function to register each state variable that needs to be restored.
Lastly, lets make some modification to our Login page particularly to facilitate navigation to the Sign Up page.
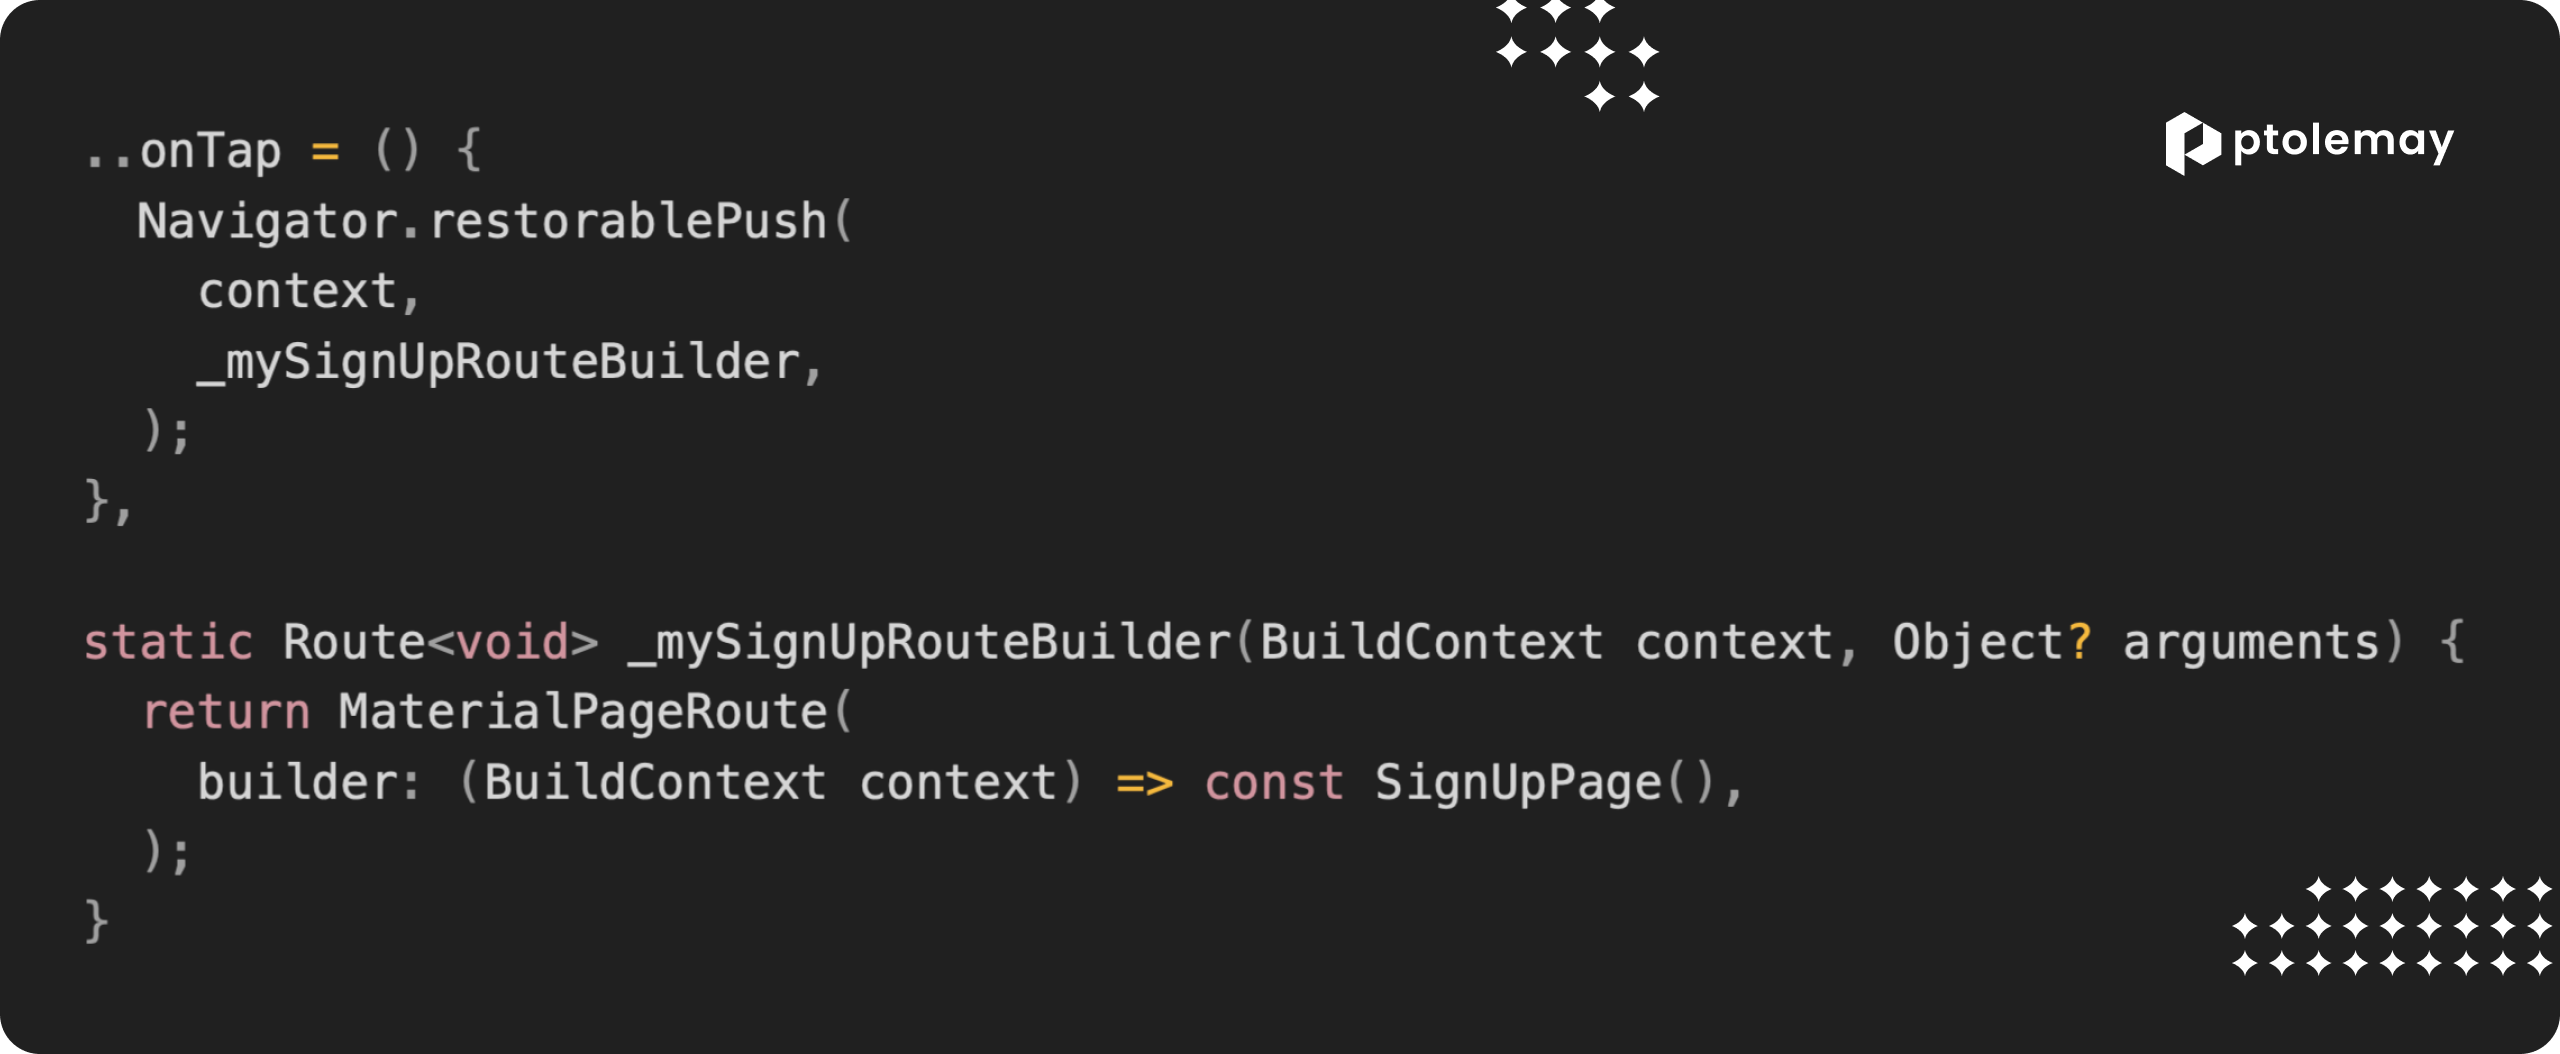
Within onTap callback, we use Navigator.restorablePush instead of the conventional Navigator.push method. The restorablePush method is specifically designed for use with restoration and ensures that the navigation state is properly restored when the app is terminated or restarted.
And here is the result of our efforts, showcasing the complete project.
As a bonus, let's explore other restorable types and additional features.
Flutter's restoration framework offers various types of restorable objects beyond RestorableTextEditingController and RestorableBool. You can utilize RestorableInt, RestorableDouble, RestorableString, and even RestorableDateTime to persist and restore different data types in your app.
Furthermore, you can extend restoration capabilities beyond simple form fields. For instance, you can restore the scroll position of a ListView or ScrollView using RestorableScrollController, ensuring that users can seamlessly continue from where they left off, even after app termination.
Additionally, Flutter provides mechanisms for managing the restoration of complex UI states and navigation stacks. You can leverage RestorableRouteFuture to restore the state of asynchronously loaded routes, such as dialogs or bottom sheets, enhancing the overall user experience.
In addition to the built-in restorable types provided by Flutter, you can create custom restorable types tailored to your application's specific needs. To create a custom restorable type, you typically subclass RestorableProperty<T> and implement the necessary methods.
Discover the ultimate guide to hiring Flutter developers.
Boost User Satisfaction: Flutter's Seamless State Restoration
Flutter's restoration framework empowers developers to create apps that persist and restore user state seamlessly, enhancing the overall user experience. By leveraging built-in restorable types and mechanisms for managing complex UI states and navigation stacks, developers can ensure that their apps remain resilient across device restarts and app terminations. Through careful implementation of restoration functionality, developers can provide users with a consistent and uninterrupted experience, ultimately increasing user satisfaction and app reliability.
Considering developing a new app for your business? Explore our AI-driven cost estimation tool to plan your project with confidence. Start your journey today!
Meet Our Expert Flutter Development Team
Our full-cycle Flutter development team at Ptolemay specializes in building high-quality, cross-platform apps from start to finish. With expert skills in Dart, backend integrations, and seamless UX across iOS and Android, we handle everything to make your app launch smooth and efficient.
.png)
